동기
Gatsby로 블로그를 만들 때 Gatsby Starter Blog 테마를 적용했다. 매우 깔끔한 테마에 파일 구조도 단순하여 금방 글을 작성하여 배운 내용을 정리하고 있었다.
어느덧 게시글 수가 20개를 향해가다보니 한 페이지에 너무 많은 글이 보이기 시작했다.
Gatsby Starter Blog 테마에서는 Pagination을 지원하지 않는다. 그래서 찾아봤더니 공식 문서에서 기능을 개발하는 방법을 제공하고 있었다.
그러나 🔗공식 문서에서 제공하는 방법을 그대로 적용시키려니 잘 안되었다.
React에 대해서 무지했던 나는, 문서도 제대로 읽지 않고 그대로 코드를 복붙하여 넣었다. 당연히 안되니까 의지가 팍 상해버렸다. 제대로된 이해가 필요했다.
Gatsby 이해하기
Gatsby는 React를 기반으로 **정적 웹페이지 또는 애플리케이션**을 빠르게 제공하는 프레임워크다.
즉, Gatsby로 만든 블로그는 사실 Gatsby가 만든 정적 페이지인 것이다.
gatsby build를 실행하게 되면 여러 절차를 거쳐 gatsby-node.js로 도달하게 되는데 여기에서 사이트에 필요한 모든 페이지를 생성한다.
gatsby-node.js에는 GraphQL을 통해 폴더 구조에 들어있는 모든 파일을 조사하여 블로그로 보여줄 페이지를 생성하는 코드가 작성되어 있다.
공식 문서 이해하기
공식 문서에서 제시한 방법은 이렇다.
먼저 BlogList라는 컴포넌트를 작성하는데, 여기에는 쿼리를 통해 전체 게시글중 일부만 SELECT하여 게시글 리스트를 보여주는 JSX표현식(이 용어가 맞나?)을 갖고 있다.
BlogList는 src/template/blog-list-template.js에 저장되어 있다. 빌드를 할 시기에 gatsby-node.js에서 전체 페이지를 만들 때 저 파일을 불러온다. 결과적으로 빌드가 끝나면 아래처럼 페이지가 생성된다.
정적페이지
|   // 게시글
+-- post A
+-- post B
|   ...
|
|   // 게시글 리스트
+-- post-list-page-1-to-10
+-- post-list-page-11-to-20
    ...
Gatsby Starter Blog 테마에 바로 적용할 수 없었던 이유는, 내가 멍청하게도 src/pages/index.js 를 수정하려고 해서 그랬다. 사실 그대로 적용해도 잘 작동한다. 새로 blog-list-template.js파일을 만들지 않아도 될 것 같다고 착각해서 그랬다.
Pagination 적용하기
공식 문서에서 제공하는 방법을 그대로 따라했지만, 자잘하게 수정할 점이 있었다.
쿼리 수정
GraphQL 쿼리에서는 edges라는 필드?에 접근하고 있는데 그 부분을 완전히 제거했다.
Gatsby Starter Blog 테마에서는 게시글 목록을 갖고 올 때 const posts = result.data.allMarkdownRemark.nodes를 통해 접근하고 있었기 때문에 쿼리를 수정하든가 저 코드를 수정해야했다.
export const blogListQuery = graphql`
  query blogListQuery($skip: Int!, $limit: Int!) {
    site {
      siteMetadata {
        title
      }
    }
    allMarkdownRemark(
      sort: { frontmatter: { date: DESC } }
      limit: $limit
      skip: $skip
    ) {
      nodes {
        excerpt
        fields {
          slug
        }
        frontmatter {
          date(formatString: "MMMM DD, YYYY")
          title
          description
          tags
        }
      }
    }
  }
`
src/pages/index.js 삭제
Pagination이 적용된 게시글 리스트 페이지를 생성하려고 보니 첫 페이지는 루트 경로, 즉 /로 접근할 때 보여줄 페이지를 만들고 있었다.
그런데 src/pages/index.js라는 파일이 존재하기 때문에 한 경로에 두 페이지가 생성되고 있다. 몇몇 사이트에서는 Redirect를 이용하라고 되어있었지만, 사이트에 처음 접속하면 Redirect되는 순간 404에러가 발생했다.
해결 방법은 그냥 단순하게 파일을 삭제하는 것이었다. 프레임워크의 정확한 동작을 모르지만 index.js가 루트 경로를 담당하는 페이지 역할을 하는 것 같다.
네비게이션 버튼 만들기
이제 빌드를 하면 Pagination이 적용되어 게시글 리스트 페이지가 여러 개 생성된다.
이제 네비게이션으로 페이지를 이동할 수 있게 새로 컴포넌트를 만들어야 했다.
이건 조금 하드코딩을 했다.
먼저 pagination에 필요한 몇 가지 정보를 context에 담아 전달했다.
// gatsby-node.js

exports.createPages = async ({ graphql, actions, reporter }) => {
  // ...

  const postsPerPage = 10 // 한 페이지에 보여줄 게시글 수
  const paginationPageCount = Math.ceil(posts.length / postsPerPage) // 전체 페이지 수
  const numPagination = 5 // 네비게이션에 보일 페이지 수

  Array.from({ length: paginationPageCount }).forEach((_, i) => {
    // create paginated page.
    createPage({
      path: i === 0 ? `/` : `/${i + 1}`,
      component: path.resolve("./src/templates/pagination.js"),
      context: {
        limit: postsPerPage,
        skip: i * postsPerPage,
        currentPage: i + 1,
        numPagination,
        paginationPageCount,
      },
    })
  })
}
현재 페이지, 전체 페이지 수, 네비게이션에 보일 페이지 수를 전달했다.
페이지를 생성하는 코드에서는 위 정보를 그대로 컴포넌트에게 전달했다.
// src/template/pagination.js

export default class PaginationPage extends React.Component {
  render(){
    const location = { pathname: "/" }
    const siteTitle = this.props.data.site.siteMetadata?.title || `Title`
    const posts = this.props.data.allMarkdownRemark.nodes

    return (
      <Layout location={location} title={siteTitle}>
        <Bio/>
        // 게시글 리스트 구조 코드

        <Pagination
          currentPage={this.props.pageContext.currentPage}
          numPagination={this.props.pageContext.numPagination}
          paginationPageCount={this.props.pageContext.paginationPageCount}
          />
    )
  }
}
컴포넌트에서는 주어진 정보를 토대로 html 태그를 생성하고 className을 설정하여 하이라이트 되도록 했다.
// src/components/pagination.js

import * as React from "react"

const Pagination = ({ currentPage, numPagination, paginationPageCount }) => {
  const previousPaginationLastPage =
    Math.floor((currentPage - 1) / numPagination) * numPagination
  const nextPaginationFirstPage =
    Math.floor((currentPage - 1) / numPagination + 1) * numPagination + 1

  let previousPagination, nextPagination
  if (currentPage > numPagination) {
    previousPagination = (
      <a
        className="pagination-link pagination-previous"
        href={`/${previousPaginationLastPage}`}
      >
        {"<<"}
      </a>
    )
  }
  if (nextPaginationFirstPage <= paginationPageCount) {
    nextPagination = (
      <a
        className="pagination-link pagination-next"
        href={`/${nextPaginationFirstPage}`}
      >
        {">>"}
      </a>
    )
  }

  //
  const paginationList = Array(paginationPageCount)
    .fill()
    .map((_, i) => i + 1)
    .slice(previousPaginationLastPage, nextPaginationFirstPage - 1)

  return (
    <div className="pagination">
      {previousPagination}
      {paginationList.map(index => {
        return (
          <a
            className={`pagination-link${
              index === currentPage ? " pagination-current-link" : ""
            }`}
            href={`/${index !== 1 ? `${index}` : ``}`}
          >
            {index}
          </a>
        )
      })}
      {nextPagination}
    </div>
  )
}

export default Pagination/* src/styles/pagination.css */
/* src/style.css에서 import하고 있습니다. */
.pagination {
display: flex;
justify-content: center;
align-items: center;
}
.pagination-link {
color: black;
vertical-align: middle;
padding: var(--spacing-2) var(--spacing-4);
text-decoration: none !important;
}
.pagination-link.pagination-current-link {
background-color: var(--color-primary);
border-radius: 6px;
color: white;
}결과물
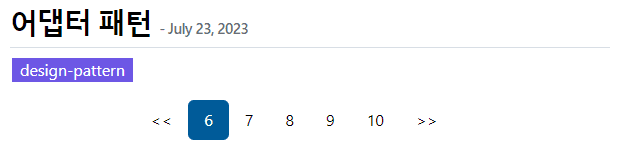
React에 대해 잘 모르지만 열심히 코드를 뜯어보며 이해하니 매우 간단하게 구현할 수 있었다.
다음엔 Github dicussion을 이용해 댓글 기능을 추가하는 기능과 구글에서 이 블로그를 검색할 수 있는 기능을 구현해야겠다.